*Updated January 8, 2019*
This post has been updated with additional narrative on my second autumn trip to Tokyo.
It was our fourth day in Japan and the endless drizzle since day one didn’t seem to get tired. A super typhoon from the Philippines was heading directly to Tokyo and almost half of the establishments in the capital city are shut for the day. Fortunately, the subway was fully operational. Me and my buddies were aiming for an awesome autumn trip but were devastated by the weather report. We may have been doomed to be soaked but our spirits are brighter than the sun. Resiliency is my favorite characteristic of the Filipino people.
I never dreamt of going to Japan, really. I dunno why, but it
doesn’t have this appeal or charm of a rustic countryside that I enjoyed when I
was in Myanmar or Nepal. Also, its reputation of being one of the world’s most
expensive countries is totally a hindrance with my meager means to travel. But with a little urge from my
travel buddies (and after them securing a great deal on a Manila to
Tokyo flight), a plan was made to conquer the Land of the Rising Sun—it was a first
for me and countless for them.
 |
| The ever efficient Japanese toilet is one of the many things I miss about Japan. |
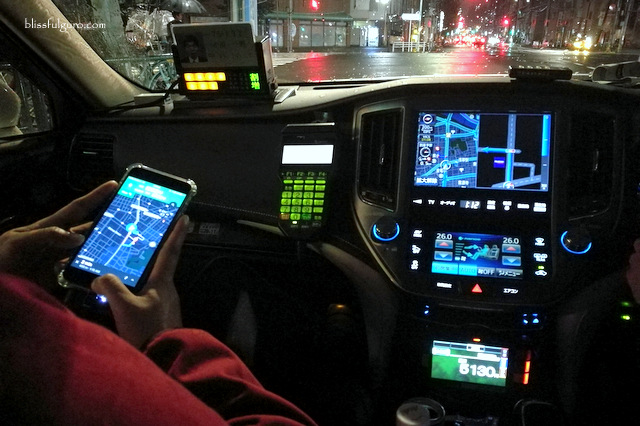 |
| Tokyo cabs are so technologically advanced and costly. |
Cold, wet, soaked, but everyone was in good mood. Our five days of
exploring Tokyo and its nearby provinces could be summed up in this useful guide
to help first-timers in realizing their Japan dreams.
UPDATE (January 2019). In November 2018, my mom suddenly had this desire to go to Japan (it’s her first time). It was same time last year when my friends and I went to Tokyo for autumn. She said that it was her dream destination as my late dad used to tell her great stories about the place plus, she’s into some cactus addiction lately and the country holds some of the best in the world. So there we were, three weeks prior our planned vacation, cramming about our first tandem trip abroad.
Having been to Tokyo exactly a year before this trip, I already knew what to expect, or so I thought.
My 63-year old mom (who's a kidney transplant survivor for eight years now), has her limitations when it comes to doing physical activities which I realized on our first day. As much as I wanted to show her every little thing that made me fall in love with this country, she easily gets tired. So I made it a point to take it really slow and just choose the sights to see with our limited time.
JAPAN TRAVEL VISA
The State of Japan requires a visa for different types of travelers when visiting
the country. Check out the link for a complete and easy guide on Applying for Japan Tourist Visa in the Philippines.
UPDATE (January 2019). I applied for the second time for a tourist visa during my latest trip. Gladly, I got a multiple-entry visa valid for five years with a maximum stay of 30 days each visit. My detailed account on how I got it is on the same link above.
AIRFARE
There are cheaper options to go to Japan without breaking the bank. Subscribe to Low-Cost Airlines' websites and mock-book every day (yes, it has to be a daily routine for cheapos) to see promo deals on airfares. We secured a roundtrip Manila to Tokyo flight six months prior this trip for roughly P12,000 per person. Not as cheap as I wanted it to be but it's quite a great deal.
UPDATE (January 2019). My latest Japan impulse trip had its downside in terms of purchasing the airfare. I've been subscribed three weeks prior the trip to all airline websites that have direct flight from Manila to either Haneda or Narita Airports near Tokyo. Two weeks before our target flight, I noticed that the ticket prices started to become steep (which will be the trend for the next few days). I immediately purchased the cheapest fare I found at P19,500 for a roundtrip ticket from Manila to Narita Airport. It was way too much for what I was used to but my mom couldn't wait much longer so we grabbed it.
 |
| Cebu Pacific check-in counter at Narita International Airport. |
WEATHER FORECAST
Having been to Seoul in January of 2017 during wintertime, I kinda knew what
to expect for early autumn. We arrived at Narita International Airport early in
the morning where the temperature check was 10 deg. C. That was bearable for a tropical gal like me because I was donned in proper outfit.
Every day, we regularly checked the weather forecast right before our morning coffee. A super typhoon coincided with our trip which let us use the famed Japanese transparent umbrellas. We couldn’t be grumpy with this kind of weather though as we're so used in dealing with it during monsoon season in the Philippines.
UPDATE (January 2019). During the course of our five-day stay, my mom and I enjoyed a sunny but chilly weather in Tokyo. It was early November and hues of yellow, orange and red dominated the city's mid-autumn foliage. The coldest was 9 deg. C. while the hottest was 16 deg. C. But it wasn't the temperature that we're concerned about but the shorter daylight time (sunset was at 4:30 pm). So we planned our itinerary very well to maximize the autumn sunlight.
FOREX
Foreign Currency Exchange can be tricky in Tokyo. I skipped the money
changer counters at the airport and sought the banks near our hotel for my money exchange needs.
I always bring US Dollars when I travel abroad so I always check the highest
possible rates that were posted outside the banks. When I entered this certain
bank because of its higher rate, I was surprised when I learned that it's the
Selling
Rate which means that it's the rate they use when you secure US
Dollars from them. Apparently, they have other rates when you exchange your US
Dollars to Japanese Yen or the Buying Rate (US$1 = Y109.94) which is not usually posted outside the banks.
The rate was fair enough though when I compared it to a reputable online
currency exchange site so I went on with the transaction. I filled out a form
where I had to write my hotel and room number (no need for passport
verification for the name) and the exchange went on smoothly.
UPDATE (January 2019). For my second Japan trip, I exchanged around US$20 immediately after arriving at the airport which my mom and I used for our quick lunch. That same night, we went to Shibuya and looked for reputable money exchange centers that I saw on an online review which are usually open until late at night. The exchange rate was comparable to an online currency exchange site so I went on with the smooth transaction.
UPDATE (January 2019). For my second Japan trip, I exchanged around US$20 immediately after arriving at the airport which my mom and I used for our quick lunch. That same night, we went to Shibuya and looked for reputable money exchange centers that I saw on an online review which are usually open until late at night. The exchange rate was comparable to an online currency exchange site so I went on with the smooth transaction.
AIRPORT TRANSFER
Getting to Downtown Tokyo from Narita International Airport is easy peasy.
You have a number of options such as using the local regular train, express
train, private chartered car, airport limousine bus and shared mini bus. I
consulted with my ever reliable Klook App on my smartphone to check the easiest and
fastest way to get to the city and found the most ideal for the group.
Prior to this trip, we checked our options and decided to purchase two one-way tickets for Tokyo Skyliner. It was a great deal at P990 (US$19.32) which will take 41 minutes to reach Downtown Tokyo (Ueno) from Narita International Airport. The vouchers were sent through e-mail and stored on my phone. All we needed to do was to get the redemption coupon from the voucher
pick-up points at Narita International Airport to use it.
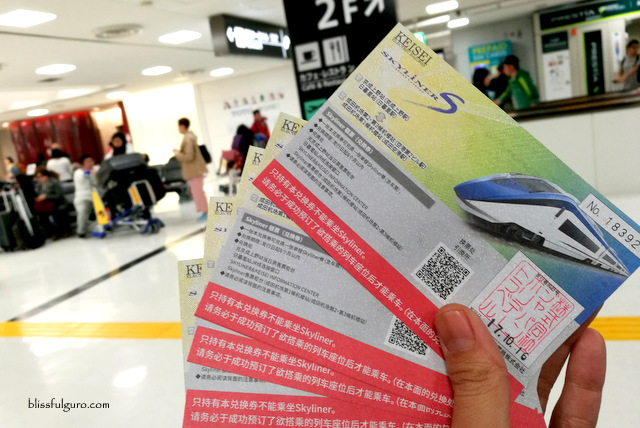 |
| Narita International Airport to Downtown Tokyo in 41 minutes. |
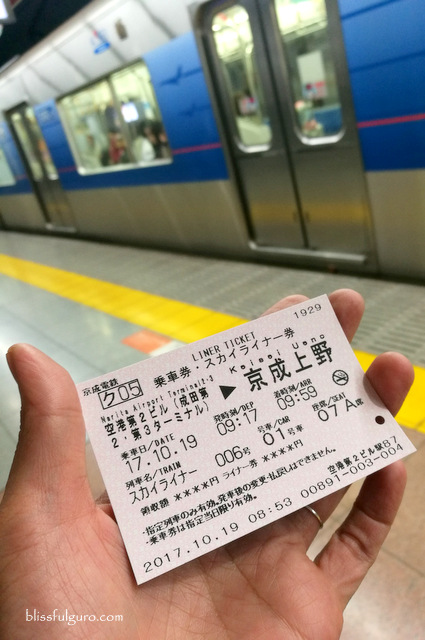 |
| You need to redeem a physical ticket using your Skyliner voucher. |
 |
| Skyliner Express Train |
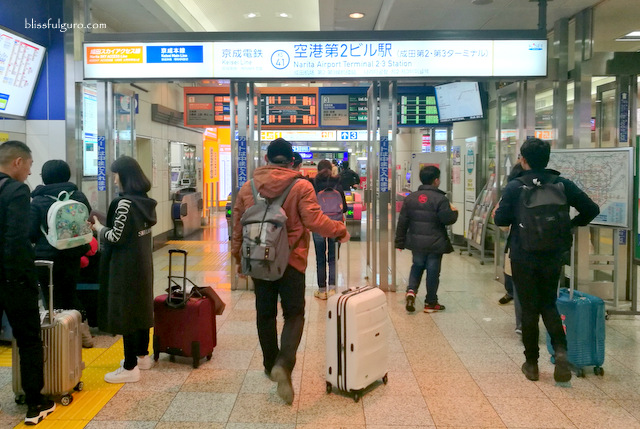
UPDATE (January 2019). My mom and I did the same thing on my recent Tokyo trip. We purchased Skyliner tickets to and fro downtown Tokyo from Klook and redeemed the physical ticket at Skyliner & Kensei Information Center at Narita International Airport Terminal 2.3 Train Station. Just like before, we skipped the long queue of on-the-day passengers and went on with claiming our tickets with assigned coach and seat numbers. Other local trains use the same platform so be aware of your departure time as you might hop on a different one.
Going to the airport from downtown Tokyo, we, again, exchanged our vouchers for physical Skyliner tickets at Skyliner & Kensei Information Center at Ueno Station and sped our way to the airport in 41 minutes.
STAY CONNECTED
(WIFI RENTAL versus SIM CARD PURCHASE)
(WIFI RENTAL versus SIM CARD PURCHASE)
When I go out of the country, I find it easier to connect to the world
(especially to my mom) by getting a pocket WiFi device or local sim card. Data
roaming from my telecommunications provider in the Philippines is totally out
of the question because of the exorbitant (and sometimes hidden) fees incurred
while on the service.
Using the handy dandy Klook App, we narrowed our choices to Portable WiFi Device and local sim card. We ended up purchasing four local sim cards through the easy navigable app.
We could’ve purchased just one sim card and use one smartphone as a WiFi
Hotspot but as per our previous trips, we’re kinda prone to getting lost so it
will be so much easier to get our own sim cards.
 |
| One of our travel hacks. |
Just like our Skyliner Train vouchers, we headed at HIS Counter on the International Arrival Hall of Narita Airport’s Terminal 2 to get our sim cards.
We showed the staff our Klook vouchers from my
smart phone (I love paperless transactions) and the standard procedures were
done.
We were then given four sim cards including a guide on the connectivity
specifications and right away, we were connected again to the world. We never had any
problems at all with our data connection even at the remotest area we’ve been to plus, we didn't consume all of the 3GB allocation. It’s so amazing to get fast and reliable internet
connection for a bargain price (a total contrary on the internet situation in the Philippines).
UPDATE (January 2019). Life is always easier when you're connected to the world. Not only do I use it for my social media activities but it also helped me navigate the confusing Tokyo's train system through online maps and subway apps. Plus, communicating with locals was easier as I had translator apps in my smartphone.
I purchased a local sim card with 3GB Data for 8 days during my second trip to Japan. And just like my old one, I never had any problems with it in terms of data connection.
UNLIMITED TOKYO SUBWAY PASS
The Tokyo Subway is a part of a very extensive and complex rapid
transit system around Greater Tokyo area. The train fare might be pricey compared to other
highly urbanized cities (like Singapore) but it’s always efficient. We had five
days of exploring the city and all those times, we used the subway, well, except for that one time when we went back to our hotel past the subway's closing time, because beer night.
Getting a single ticket every time (considering a number of
transfers on the way) could be a hassle. So when I saw a deal on Unlimited Tokyo
Subway Pass on Klook App, I immediately shared it to my buddies which they all
agreed on getting.
 |
| We're the only ones who were chatting inside the trains. |
Just like how we redeemed the Skyliner Airport Transfer and 3GB Data
Sim Card, we headed at HIS Counter on International Arrival Hall of Narita
Airport’s Terminal 2 to get our unlimited subway passes.
 |
| Lifesaver |
I have to reiterate the practicality of having an unlimited subway pass
as we were lost a few times and having the assurance of indefinite train
rides reduced our stress. We just laughed about our mistakes and
went on with our adventures. Plus, one-way tickets are costly. I checked once
and realized that one station is equivalent to almost US$2. So it’s wiser to
get the unlimited access on the major subway lines of Tokyo Metro.
UPDATE (January 2019). If you would ask me for my favorite Klook purchase for both my Japan trips then that would be the Unlimited Tokyo Subway Pass. For my recent trip, I purchased one 72-hour and one 24-hour passes individually. What I love about the pass is that the validity of the card starts on your first ride and not on a per-day basis. Tokyo is one of the most expensive cities to live in the world and you wouldn't want to shell out all your money on expensive cab rides or single journey subway tickets.
UPDATE (January 2019). If you would ask me for my favorite Klook purchase for both my Japan trips then that would be the Unlimited Tokyo Subway Pass. For my recent trip, I purchased one 72-hour and one 24-hour passes individually. What I love about the pass is that the validity of the card starts on your first ride and not on a per-day basis. Tokyo is one of the most expensive cities to live in the world and you wouldn't want to shell out all your money on expensive cab rides or single journey subway tickets.
SUBWAY APP
In highly urbanized cities, I always seek the help of online guide map apps
for a more smooth and efficient commute. In the case of our Tokyo trip,
navigating through the very complex 90-year old train system can be quite
stressful.
So I checked online for reliable free apps to navigate Tokyo Subway and
found Tokyo Subway App to be the most
convenient because you can use it offline. The fare will be automatically
computed, as well as, the number of transfers and the estimated amount of time
that will be spent. And always, like always, the trains will arrive exactly on
the scheduled time.
AUTUMN OUTFIT
I experienced a sub-zero snowy weather in Seoul months back so I
exactly knew what to expect when my buddies told me the early autumn weather
forecast—between 10 deg. C. to 16 deg. C.
And just like my first ever winter trip, I will be reiterating the
secrets on looking great without the numb feeling.
Know your body’s quick-cooling
spots. I learned this the hard way when I went to Seoul during wintertime. I never knew that
my hands and feet were my weakest points so it was always frozen. For this
trip, I specifically knew where to warm up more.
Layering. If there’s one
valuable thing that I learned from my winter trip is that the key in surviving
cold weather is the art of layering clothes. Wind chill during autumn can be
numbing so don’t underestimate the 2-digit temperature during these times. So
for this trip, my standard layering of clothes went like;
TOP – Thermal underwear, fleece pullover or turtle neck, and overcoat.
BOTTOM – Thermal underwear, and jeans.
FOOTWEAR – Thermal socks, and boots with wool lining.
ACCESSORIES –Wool or fleece scarf, and beanie.
Seoul's freezing winter when I was there prepped me up pretty well for this particular
trip. But the rainy weather plus the wind chill was a total shock. This is
where those cutesy transparent Japanese umbrellas came in handy.
UPDATE (January 2019). Surprisingly, I acclimatized in Tokyo's autumn weather easily compared to my past visit so I needed not to wear thermal underwear anymore.
UPDATE (January 2019). Surprisingly, I acclimatized in Tokyo's autumn weather easily compared to my past visit so I needed not to wear thermal underwear anymore.
ACCOMMODATION
For accommodation, we chose the quaint neighborhood of Asakusa because of its old Tokyo vibe. For three nights, we stayed
on the cool and hip Wired Hotel (check here for discounted room rates) and one
night on a mixed dorm in Enaka Asakusa Central Hostel (check here for discounted dorm bed rates). Surprisingly, room rates on this area are quite cheaper
compared to the areas of Shinjuku and Shibuya.
UPDATE (January 2019). Looking for a place to stay was the second thing I accomplished right after purchasing our airfare. It was two weeks prior the trip and it was a challenge looking for cheap accommodation. My mom cannot stay on a hostel as she has back problems as well as privacy issues. I checked all the available rooms on online booking sites and found one that fits our budget.
Hop Step Inn is a relatively new guesthouse on the edge of downtown Tokyo. We booked for a Double Room with shared toilet and bath for around US$50 per night for four nights, very cheap in Tokyo standards.
FOOD
My Japanese food vocabulary before this trip was limited to maki, sushi, sashimi, tempura and sukiyaki. I didn’t even like ramen, or
any noodle soup for that matter. But during the course of our five-day trip in and
around Tokyo, we’ve discovered nice yakitori alleys, cheap food thrills on
local minimarts, bargain bento meals during afternoon on groceries, and spent hours on a local pub restaurant with Japanese salarymen.
Just to give you an idea though, a regular combo meal in McDonald’s
will set you back at Y700 (US6.16). I will dedicate a separate post on our
Japanese Food enculturation.
TOURS
I specifically wanted to get lost in the narrow alleys and bright
lights of Tokyo during the course of our five-day trip. But then, my buddies were
convincing me really hard to go on day trips to nearby provinces. After so many
bribes I agreed on dedicating two days for these trips.
I am not the go-to person when it comes to plotting itineraries so I
let them choose from the wide array of offered private and shared tours via
Klook App. They then decided to explore Hakone for Mt. Fuiji sightseeing and the World Heritage Site of Nikko.
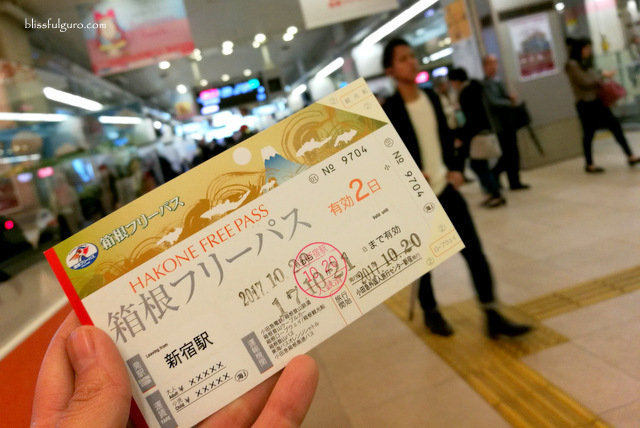 |
| Our gate pass to Mt. Fuji sightseeing |
On the Hakone Free Pass, we had unlimited trips on eight different
transportation including Hakone Tozan Bus, Hakone Tozan Cable Car, Hakone
ropeway and Hakone Sightseeing Cruise. On the other hand, the Nikko Travel Pass
let us explore Nikko by train and bus with our all-you-can-ride pass. I will
dedicate separate articles on these wonderful trips we had.
SHOPPING
I am not the person to be with when it comes to shopping. I have the
least patience in combing each and every aisle for something I don't really need. But
we all went overboard when we were stuck in a mall (BIC Camera) and hoarded
Japan-made cameras, lenses and even drones. We arrived 10 minutes prior to the shop’s
closing time and we practically owned the store and the attention of the staff. These
thingamajigs are cheaper for almost $200 compared to the ones they sell in
the Philippines. Plus, they have tax-free counters (less 8%) and additional 5% to 10%
discount when you use credit cards. Amazing, isn’t it? Imagine our credit card
bills once we set foot back home. Haha.
 |
| Techie-lovers alert! |
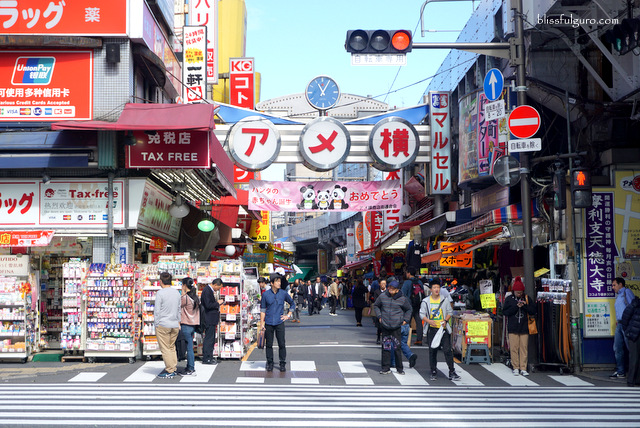 |
| Ameyoko Shopping Street |
CLEANLINESS
Almost every corner in Tokyo is clean and spotless considering that I hardly see any trash bin on the streets. My theory here is that Japanese people are naturally well-ordered in every way so even when it comes to their trash disposal, they have a systematic approach to it like keeping your own trash and segregating it at their own households.
JAPANESE PEOPLE
We were in the hunt for those elusive cactus plants that my mom
specifically requested (with photos and pinned location). After an hour of video
conference with her, we were at the check-out counter to settle our purchases.
Lost in translation, we were asking them to remove the soil as well as the pot
and wrap the plant itself with a newspaper.
After a few minutes (and after six staff converging and figuring out what
we were trying to say), we were brought to the gardening section where I saw
three staff preparing some bubble wraps and other gardening tools. And while they were
heeding to our request, you could feel the sincerity of their work as I try to tell
them that everything was for my okasan.
For this recent trip, I couldn’t think of any Japanese who was rude or
impolite. They were all calm, reserved and very passionate on their crafts.
Tokyo is very different from Southeast Asia. It is fast-paced, highly
urbanized and easy to navigate to. I have this thing with big cities being cold
and lifeless, but in Tokyo, I felt the warmth of its people in spite of the
cold and rainy weather. We never had any conflict with anything or anyone. I
will be sharing with you more stories about our early autumn/super typhoon
jaunt in the next posts. Can’t wait to tell you more.
Check here for
discounted tours, transportation and activities in Tokyo




Nice post! Thanks for sharing!
ReplyDeleteThank you too! :)
Delete